TANGLEY CALLIOPE RESTORATION PROJECT (part 24)
by Dr. Bill BlackMORE WORK ON THE CALLIOPE CASE
This month we will return to working on the calliope case. In PHOTO A we see the case as it was when we went to work on some of the internal parts. We had installed the vacuum reservoir, the roll frame shelf and the wooden sides of the case.
In a previous article I noted the unusual shape of the hole under the reservoir relief valve. It was a rather large cloverleaf shaped hole. Now that we have the vacuum supply finished we can check out the reservoir operation. When the vacuum was applied to the reservoir and it collapses, the result was an oscillation of the top of the reservoir and valve as the excess vacuum spilled off. This created a rather annoying buzz. Since the reservoir was all covered with new cloth and finished, a piece of wood was cut out to fit the cloverleaf hole and a smaller new round hole drilled in it. This hole was gradually increased in diameter unit the reservoir would spill off with no oscillation and buzz. Happily, this problem was discovered now as the reservoir is difficult to remove with the shelf in place.
PHOTO B shows some of the painted case trim, the corner moldings, handles and some trim rings. These parts were sent to the brass plater to be plated. This brass trim will compliment the brass pipework.
Since the sides and other panels of the calliope case had suffered many dents, we decided to have new sheet metal parts made to replace these damaged panels. Actually, only the two sides of the case and one bottom panel were still original pieces. The side panels were in fairly bad shape at the bottom. As patterns, we used what original panels we had and borrowed the remaining panels from the late Mike Kitners calliope for patterns.
PHOTO C shows one of the new sheet metal side panels fabricated by the sheet metal shop.
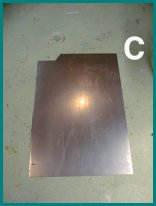
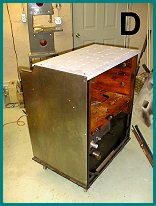
PHOTO D shows the side panel fitted to the calliope case in order to check the fit and plot the mounting holes. The top is temporarily attached to to the case in order to align everything.
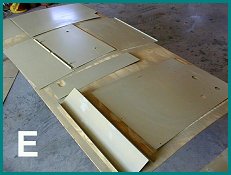
In PHOTO E, the various panels have been sprayed with an etch prime to cover the bare metal and provide a base for the lacquer finish. We later sprayed the panels with the red lacquer finish obtained from a local auto paint store. Prior to the painting, the necessary holes in the panels were punched with a hole punch.
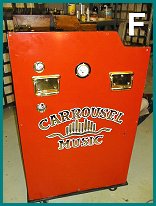
In PHOTO F, the finished side panels were taken to our local sign painting company to have my logo applied. The two side panels were fitted to the case along with the newly brass plated handles, trim and pressure gauge. The side panels need to be fitted at this point since the mounting bolts for the handles go through both the metal side panel and the wooden side underneath. There also is a mounting block inside the case which the bolts go through. This block serves to reinforce the area around the handles so the machine can be moved around with the side handles.
Dr. Bill Black is one of the nation's most knowledgeble Wurlitzer band organ experts. He has made recordings of many band organs and other mechanical music machines which are available for purchase in our CarouselStores.com website.