TANGLEY CALLIOPE RESTORATION PROJECT (part 36)
by Dr. Bill Black
COMPLETING THE EXTERIOR OF THE CALLIOPE
Now we are ready to finish the exterior panels of the calliope. First we will put some finishing touches of the vacuum and pressure box. In PHOTO A, we have applied a finish to the box. The box is mounted on a platform with casters to match the height of the platform which holds the calliope. This allows the vacuum and pressure outlets to match the hose connections on the calliope. After using wood filler to close the seams
and any imperfections in the wood surface, a coating of shellac was applied to act as a sealer. After another light sanding the box was sprayed with semi-gloss black paint. We trimmed it up with some brass corners, brass switch plates and some gold leaf.
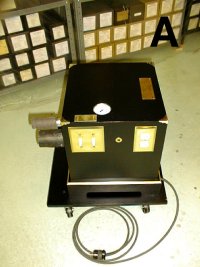 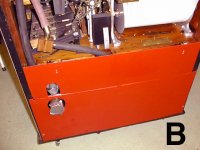
PHOTO B shows the lower panels of the case installed. The brass plated corner trim which was installed previously has been removed to show the relation between the two panels and the corner trim. When the corner trim is in place the lower panel is not removable. The upper panel shown in the picture does not fit under the trim strip to allow removal and
access to the vacuum reservoir and the roll speed control unit. This upper panel has two hooks which engage brackets on the shelf to hold it in place.
In PHOTO C we have applied the finishing touches to the sides of the case. The brass plated trim, name plate and decal have been installed.
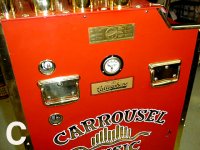
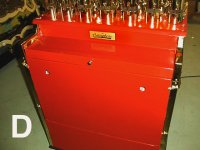 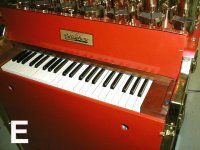
PHOTO D shows the keyboard side of the machine with the completed panels installed. We did run into a problem with the keyboard cover. We had previously used the original panels from the late Mike Kitners calliope as patterns to have the sheet metal shop duplicate. The keyboard cover with my machine was not original to the machine and fabricated with a
light weight sheet metal which did not match the original thickness. The copy made from Mikes machine was not quite wide enough or deep enough to fit. This is one piece I failed to document with photos during the disassembly of the machine. I did not know the relationship of the cover to the upper panel it rests on. An appeal to my fellow calliope owners brought pictures of their machines showing the information I needed. So, we went back to the sheet metal shop with new specs for another cover. Unhappily, this causes us to get out the paint spraying equipment to apply the various coats of finish to the new cover.
PHOTO D shows the new cover in place.
PHOTO E shows another view of the keyboard and cover. Next month we will tune the pipework.
 Dr. Bill Black is one of the nation's most knowledgeble Wurlitzer band organ experts. He has made recordings of many band organs and other mechanical music machines which are available for purchase in our CarouselStores. Dr. Bill Black is one of the nation's most knowledgeble Wurlitzer band organ experts. He has made recordings of many band organs and other mechanical music machines which are available for purchase in our CarouselStores.
|