Be sure to consult our Buyer's Guide & Fakes Database before purchasing a carousel figure. Each day, more and more knock-offs come on the market. Some look old but looks can be deceiving. Become an informed buyer.
|
|
|
 |
WURLITZER CALIOLA RESTORATION (Part 5)
REPAIRING THE CASE
by Dr. Bill Black
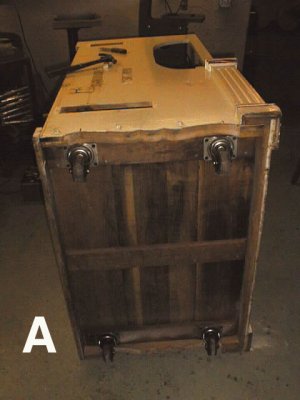 Now that the case is empty, we can lay the case over on the side to inspect
a previous repair. PHOTO A. Now that the case is empty, we can lay the case over on the side to inspect
a previous repair. PHOTO A.
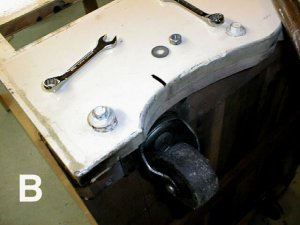 At some point, the glue joint between the lower side of the case and the
cleat which supports the bottom board on which the pressure pump sits,
failed. This occurred on the crankshaft side of the case. It had been
repaired by using bolts to refasten the side to the cleat. (PHOTO B) At some point, the glue joint between the lower side of the case and the
cleat which supports the bottom board on which the pressure pump sits,
failed. This occurred on the crankshaft side of the case. It had been
repaired by using bolts to refasten the side to the cleat. (PHOTO B)
In researching other Caliola examples, it appears that Wurlitzer used two
boards on the lower front and the back of the case on which the casters were
located. These boards supported both the sides of the case and the cleats to
mount the bottom board. There is a lot of weight on the crank side of the
case from the motor, crank, speed control etc. The casters on this machine
are located on the underside of the bottom board and the two support boards
are missing.. This removed some support for the crank side of the case and
put additional stress on the glue joint. There are several screw holes on
the underside of the case side and cleat which suggest these boards were
present in the past.
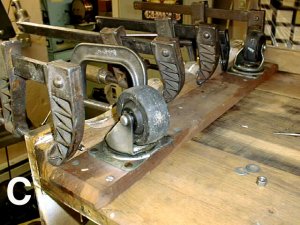 Since the case is empty, we can repair this joint. The joint can be opened
enough to get a hacksaw blade in to clean out debris and old glue by working
it back and forth. Fresh glue is inserted in the joint and multiple clamps
used to pull the joint together. PHOTO C. After the glue is set up, I
inserted some screws through the cleat into the side of the case to
reinforce the joint. I like the look of the machine with the cleats mounted
on the bottom so Iąll keep them in that location. Since the case is empty, we can repair this joint. The joint can be opened
enough to get a hacksaw blade in to clean out debris and old glue by working
it back and forth. Fresh glue is inserted in the joint and multiple clamps
used to pull the joint together. PHOTO C. After the glue is set up, I
inserted some screws through the cleat into the side of the case to
reinforce the joint. I like the look of the machine with the cleats mounted
on the bottom so Iąll keep them in that location.
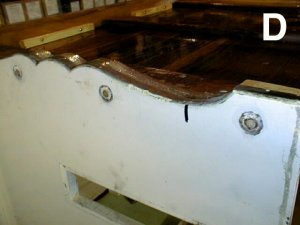 In PHOTO D, the holes for the bolts have been filled with dowels. In PHOTO D, the holes for the bolts have been filled with dowels.
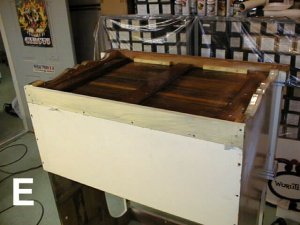 In PHOTO E, the repair is finished. I added two cleats to the back of the
case front to provide more support for the bottom board. The lower board on
the back of the case had several stripped screws and some physical damage. A
new board was made, old screw holes in the bottom board were filled with
dowels, new holes drilled in new locations to get to sound wood to hold the
screws. To locate the new board, the original board above it was put into
place to serve as a guide for the placement of the new board. In PHOTO E, the repair is finished. I added two cleats to the back of the
case front to provide more support for the bottom board. The lower board on
the back of the case had several stripped screws and some physical damage. A
new board was made, old screw holes in the bottom board were filled with
dowels, new holes drilled in new locations to get to sound wood to hold the
screws. To locate the new board, the original board above it was put into
place to serve as a guide for the placement of the new board.
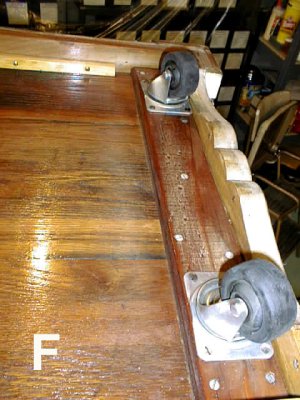 In PHOTO F, the casters have been installed, new finish applied to the base
and screws added to the joint between the case side and the cleat on the
other side of the machine to reinforce that joint also. In PHOTO F, the casters have been installed, new finish applied to the base
and screws added to the joint between the case side and the cleat on the
other side of the machine to reinforce that joint also.
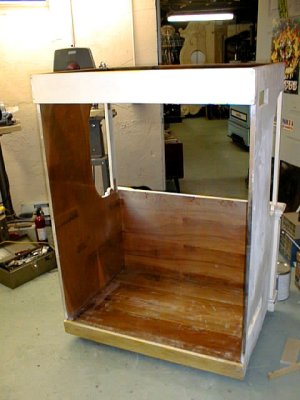 In PHOTO G, the case is now back on the casters. The inside and outside of
the case has been sanded and refinished. In PHOTO G, the case is now back on the casters. The inside and outside of
the case has been sanded and refinished.
Dr. Bill Black is one of the nation's most knowledgeble Wurlitzer band organ experts. He has made recordings of many band organs and other mechanical music machines which are available for purchase in our Gift Shop .
|
|
|
Articles, photos and other carousel and/or amusement park related content always needed. If you have something you would like published on this website please contact us at the email address below.
©2022 - Zubee Internet Services. All rights reserved. CarouselNet.com™, Carouselstores.com™, Carouselstores.net™, CarouselsNet.com™, CarouselsOnLine.com™ and CarouselResources.com™ are the property of Zubee Internet Services and may not be used without written consent from same. Images, text and all other components of this site may not be used without express written permission from the site owners.
webmaster@carouselsonline.com |
|